Installing HyperDeckSync
HyperDeckSync runs locally on your own Mac — nothing gets uploaded
anywhere, and once it’s set up it starts in a couple of seconds every
time after that. The whole process takes about a minute.
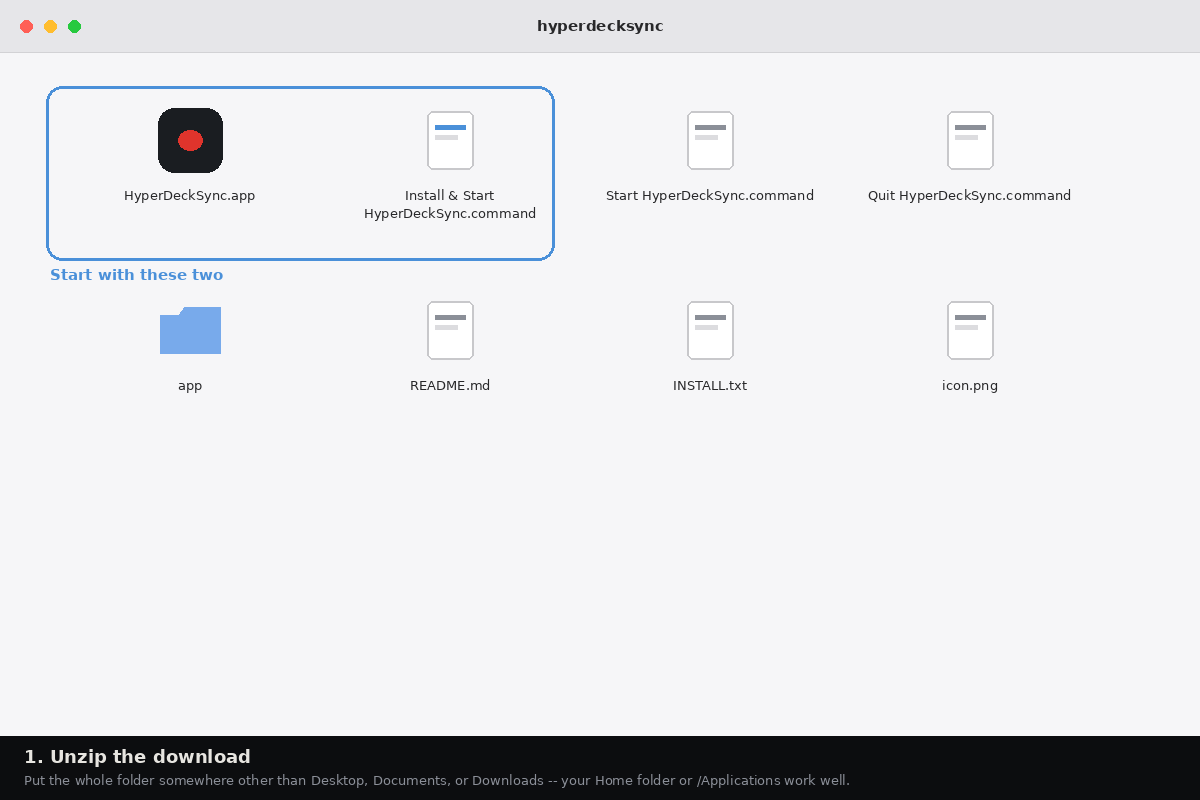
Step 1: Unzip
Download the .zip and double-click to extract it. You’ll get a folder with a few files in it — the two you’ll actually use are
**HyperDeckSync.app** and **Install & Start HyperDeckSync.command**.
**Important:** put this folder somewhere other than your Desktop, Documents, or Downloads folder — your Home folder or the Applications folder both work well. Those three folders are specially protected by
macOS, and running the app from inside one of them causes confusing errors that have nothing to do with the app itself. This one choice avoids that entirely.
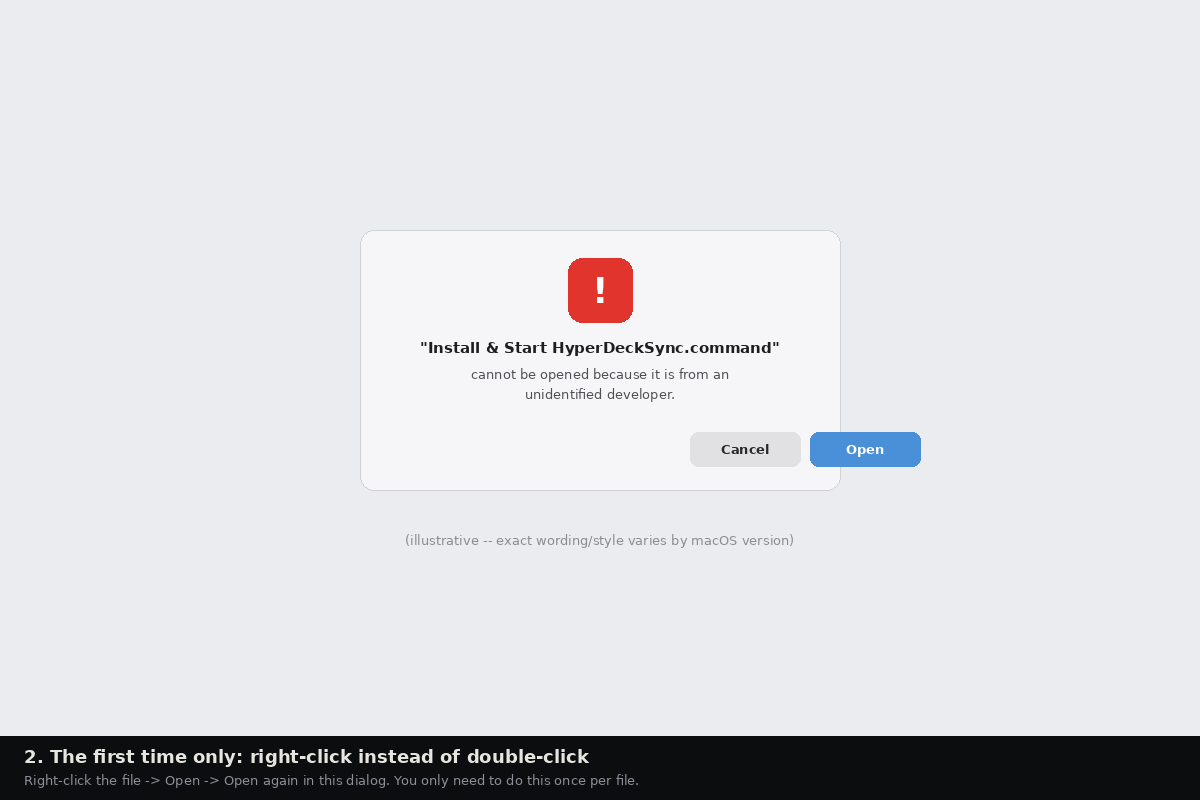
Step 2: The First Time Only — A Security Prompt
The first time you open any new app that didn’t come from the AppStore, macOS shows a warning like this. It’s completely normal — it just means the app isn’t registered with Apple, not that anything’s wrong.
**Right-click** (or Control-click) **Install & Start HyperDeckSync.command** and choose **Open**, then click **Open** again in the dialog that appears. You only need to do this once — after that, double-clicking works normally every time.
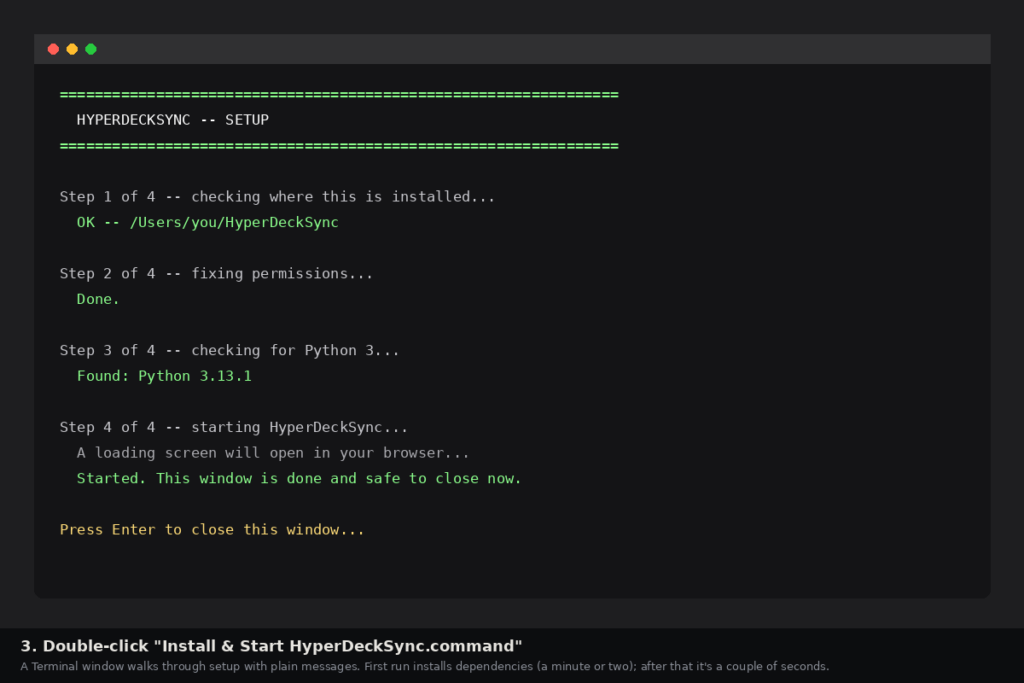
Step 3: Let the installer do its thing
A small black window (called Terminal) will open and walk you through setup automatically, printing plain messages the whole way. The very first time, it needs a minute or two to install some one-time
components — every time after that, it’s a couple of seconds.
You don’t need to do anything here except wait — if something’s actually wrong, it’ll tell you clearly what and what to do about it.
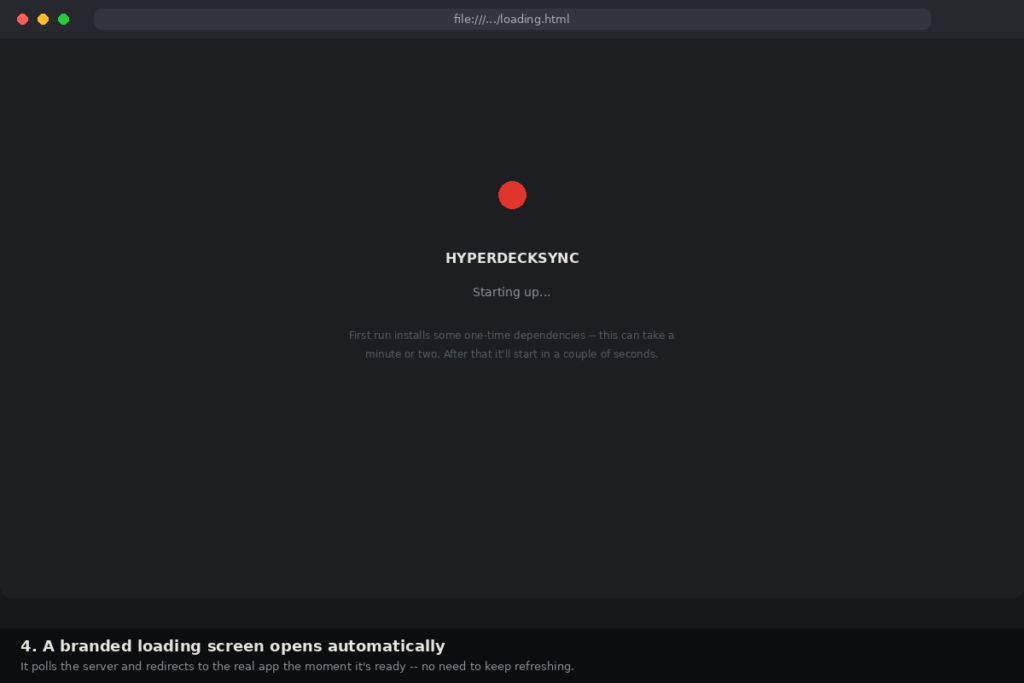
Step 4: A loading screen appears
Your browser opens automatically to a small branded loading screen.
It checks in the background and switches over to the real app the moment it’s ready — no need to keep refreshing.
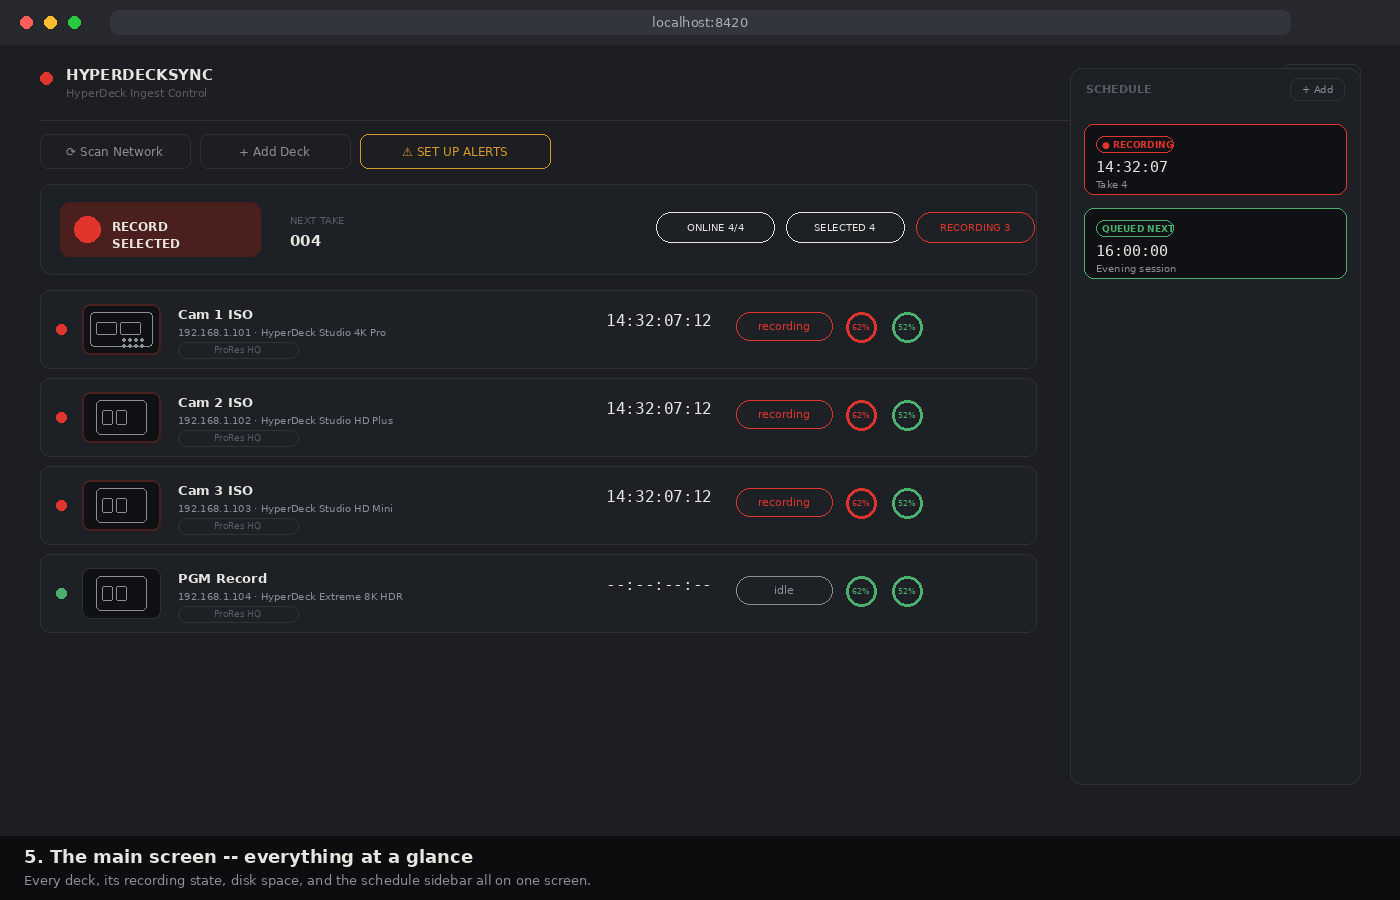
Step 5: You’re in
That’s it — the main screen. Every deck you’ve added, whether it’s recording, and how much disk space is left, all in one place.
Using it after the first time
For everyday use, just double-click **HyperDeckSync.app** — no Terminal window, just the loading screen and then straight into the app. When you’re done, use the **Quit** button in the top-right corner
of the app itself (or double-click **Quit HyperDeckSync.command**) to stop it properly.
That’s the whole install. From here, see the feature guide below for how to add your first deck and start recording.
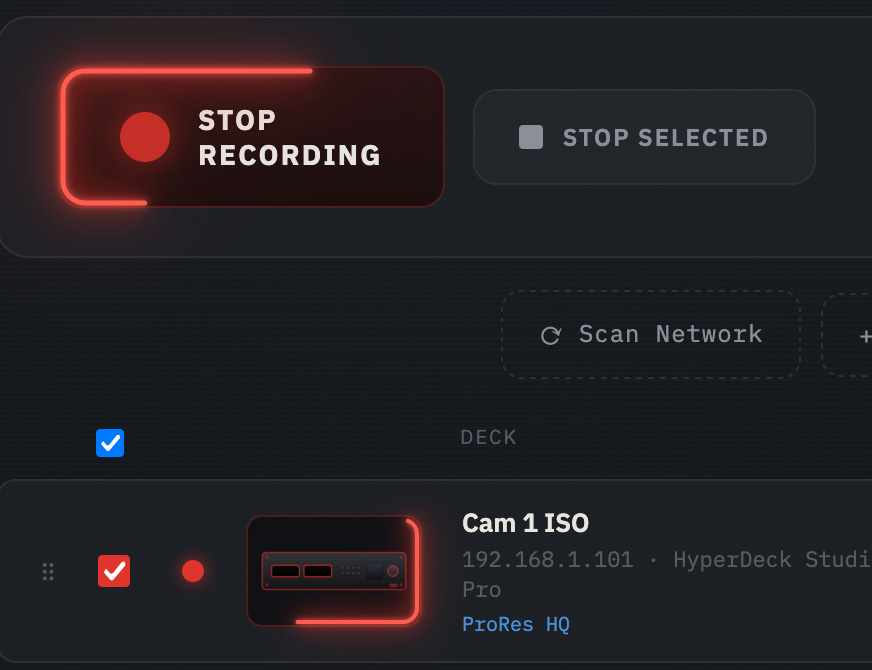
How to use HyperDeckSync
A quick guide to the main things you’ll actually do day-to-day.
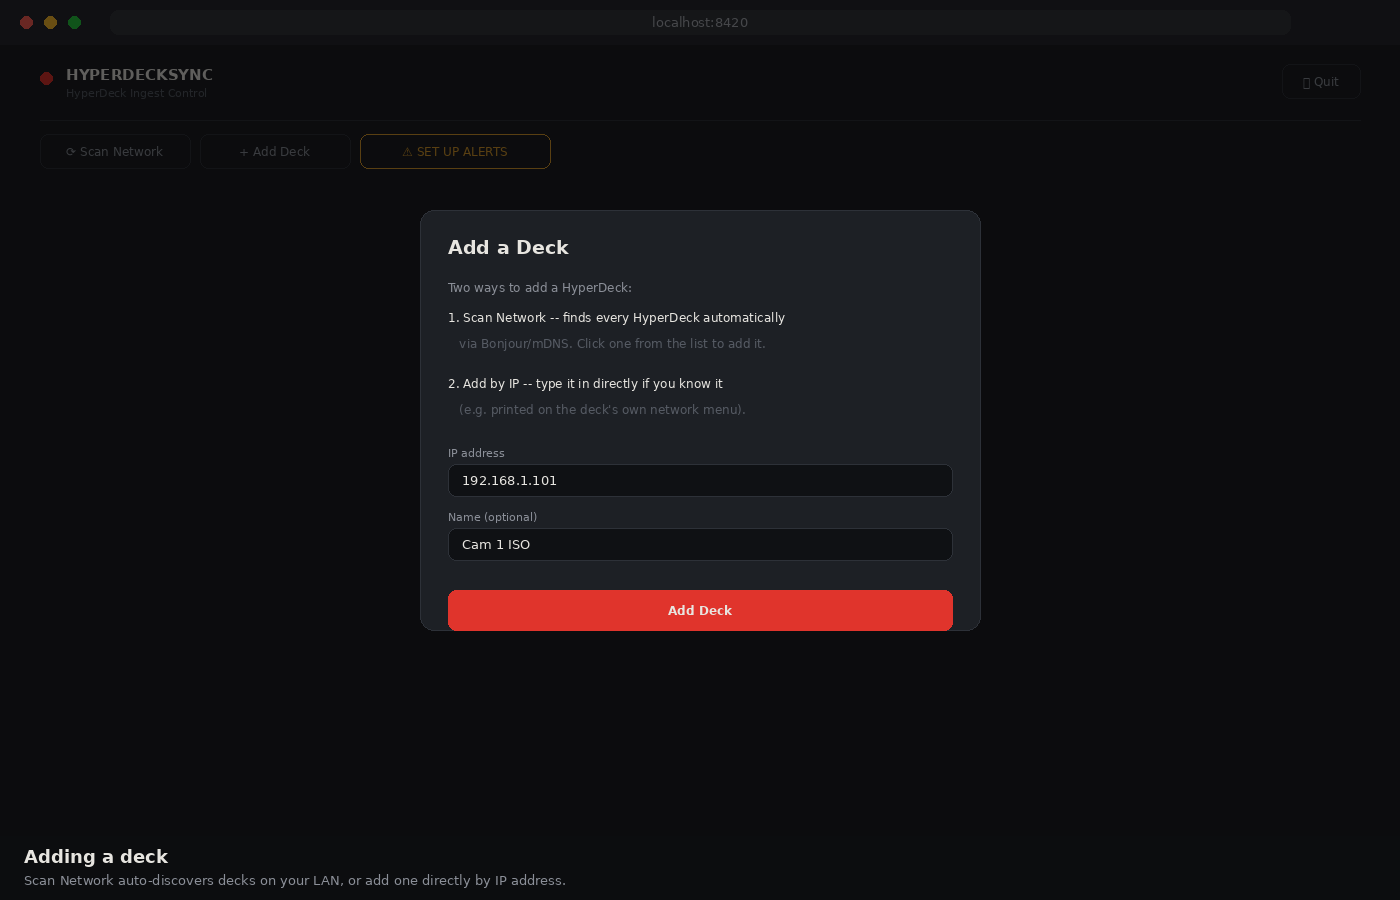
Adding a deck
Two ways to add a HyperDeck: **Scan Network** finds every deck on your local network automatically (click one from the results to add it), or **Add Deck** lets you type in the IP address directly if you
already know it.
Once added, a deck stays in your list permanently — drag rows up and down to reorder them to match your physical rack, and that order is remembered.
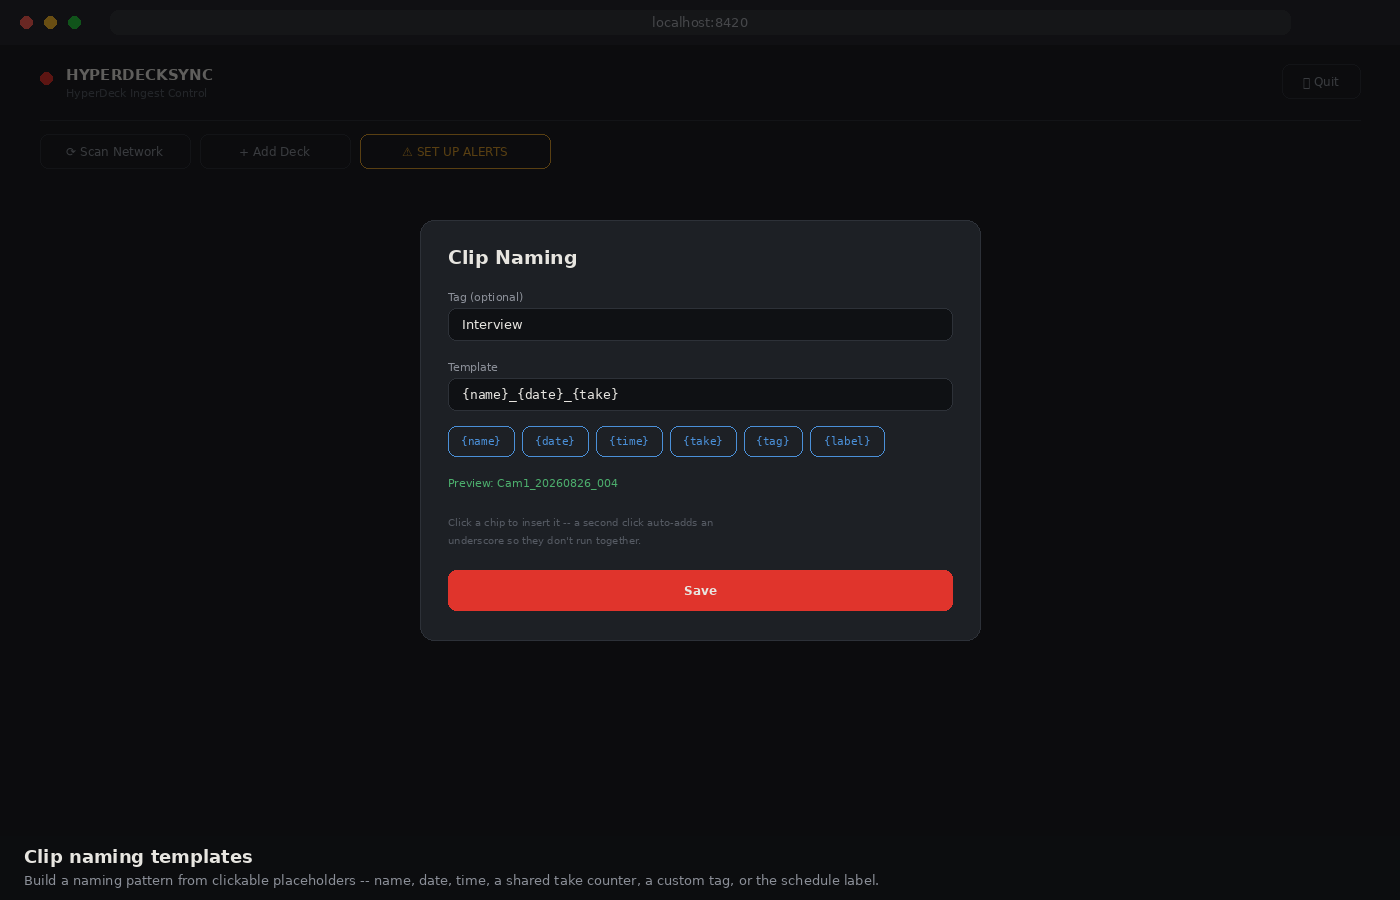
Clip naming templates
Click the pencil icon on any deck to set up how its clips get named.
Build a pattern from clickable placeholders — no need to remember the exact syntax:
– `{name}` — the deck’s name
– `{date}` / `{time}` — when the recording started
– `{take}` — a shared take counter, one number across every deck, incrementing each time you press RECORD SELECTED
– `{tag}` — a custom word you set once and reuse (e.g. “Interview”)
– `{label}` — pulled automatically from whatever scheduled entry triggered the recording, if any
Click a placeholder to insert it — click a second one right after and an underscore gets added automatically so they don’t run together.
Scheduling a recording
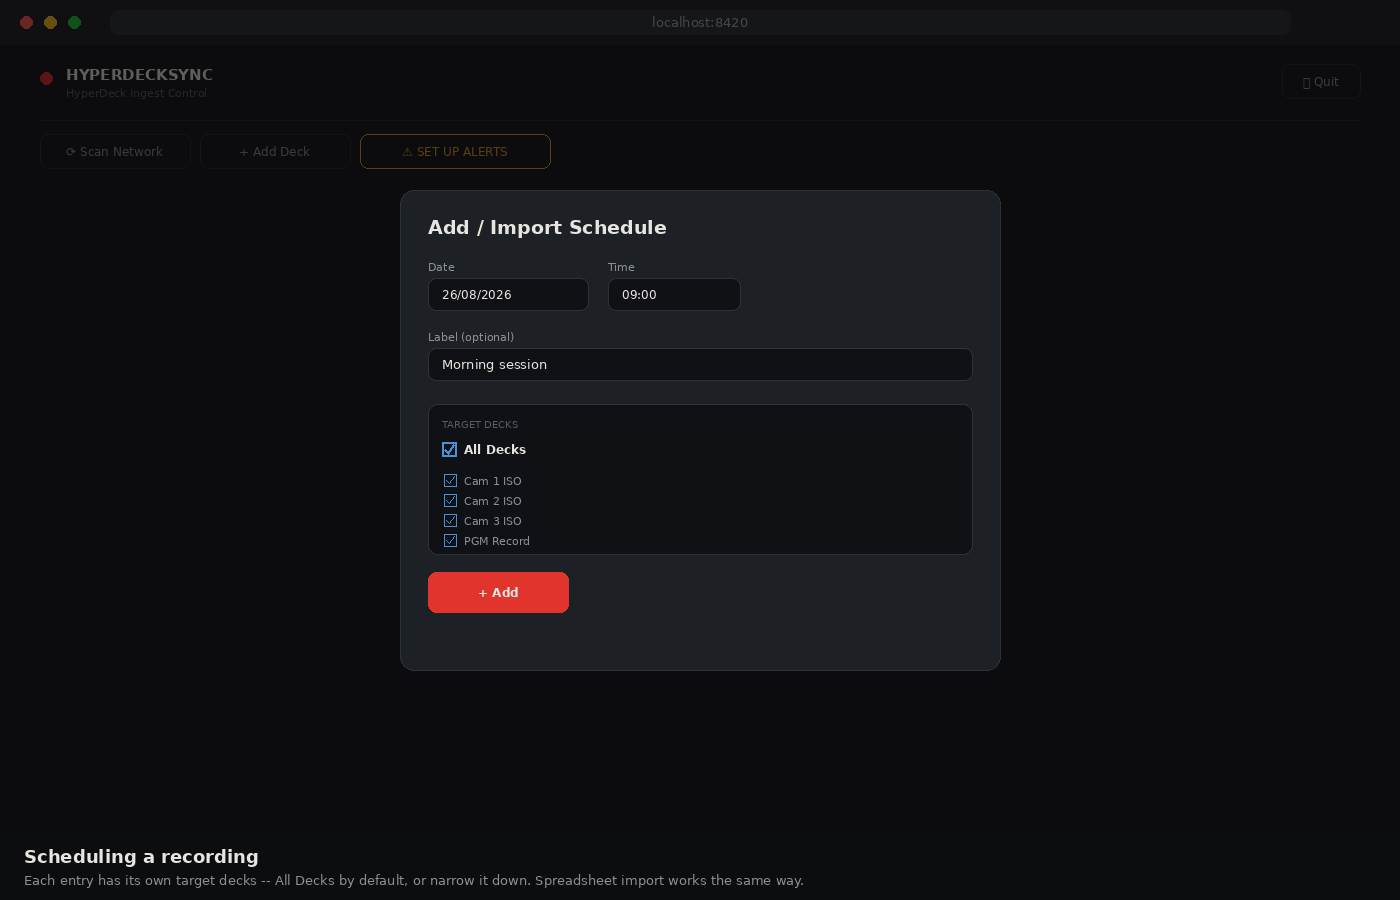
Click **+ Add / Import** in the schedule sidebar. Set a date, time, and optional label, then choose which decks it should target — **All Decks** is ticked by default, or narrow it down to specific ones. This
choice is saved with that entry specifically, so it’ll fire against the right decks even if your main selection changes later.
For a whole day’s worth of start times at once, use **Download Sample Spreadsheet** to get the exact format, fill it in, and **Upload Spreadsheet** — it supports the same optional target-decks column
(comma-separated deck names, blank means all decks for that row).
If a deck is already recording when its scheduled time arrives, it’s left alone rather than being sent a redundant command — you’ll see exactly what happened in the entry’s result text either way.
Setting up email alerts
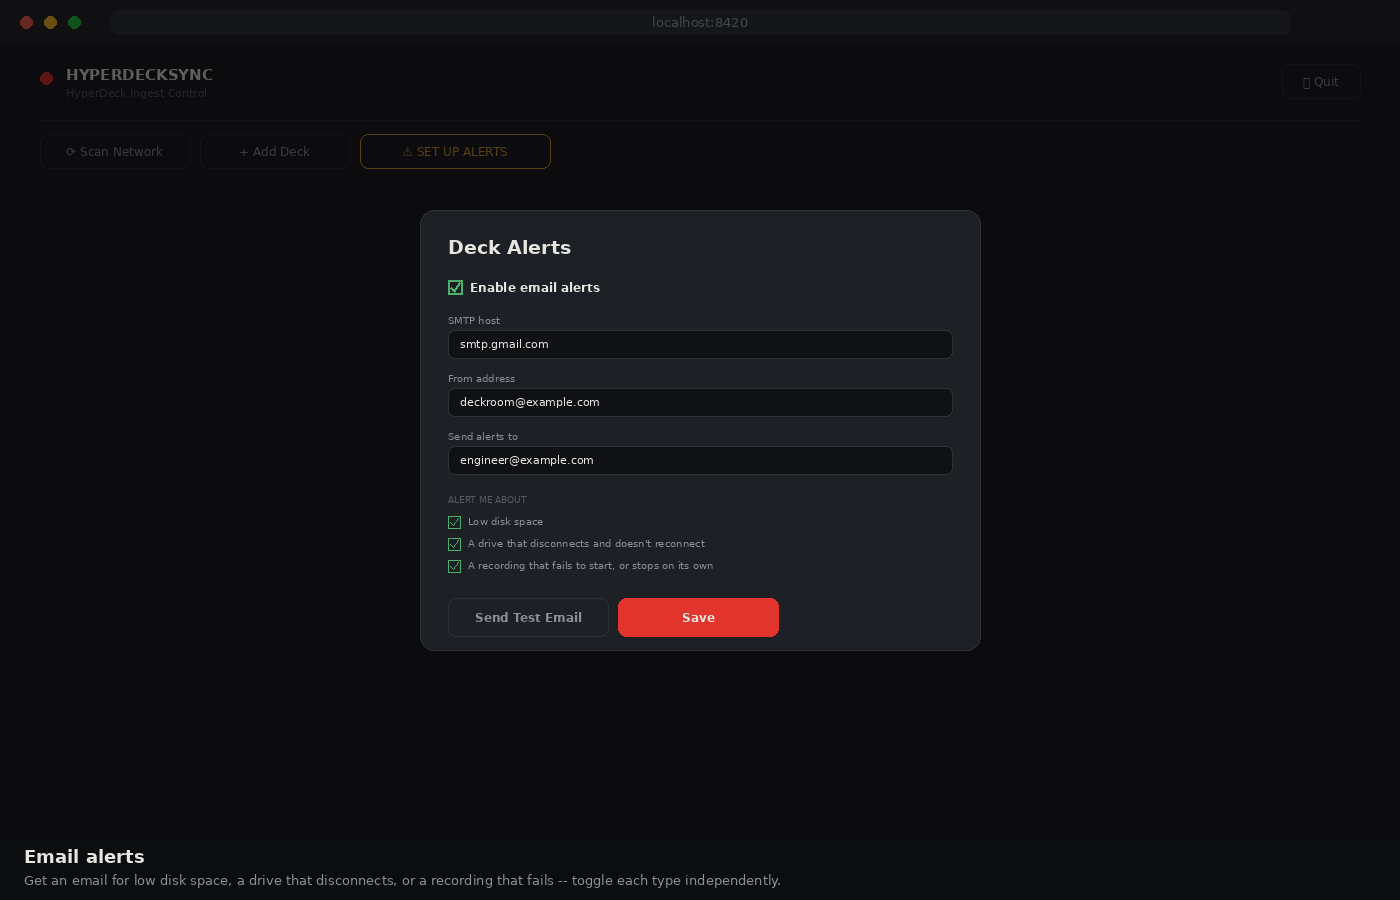
Click **⚠ SET UP ALERTS** in the toolbar (it turns green and says **✓ ALERTS ON** once configured).
Enter your email provider’s SMTP details and who should receive alerts, then choose what you want to
be told about:
– **Low disk space** — before it becomes a problem
– **A drive that disconnects** and doesn’t reconnect
– **A recording that fails to start**, or stops on its own
Use **Send Test Email** to confirm everything’s working and see exactly what a real alert looks like before you actually need one.
Browsing and downloading clips
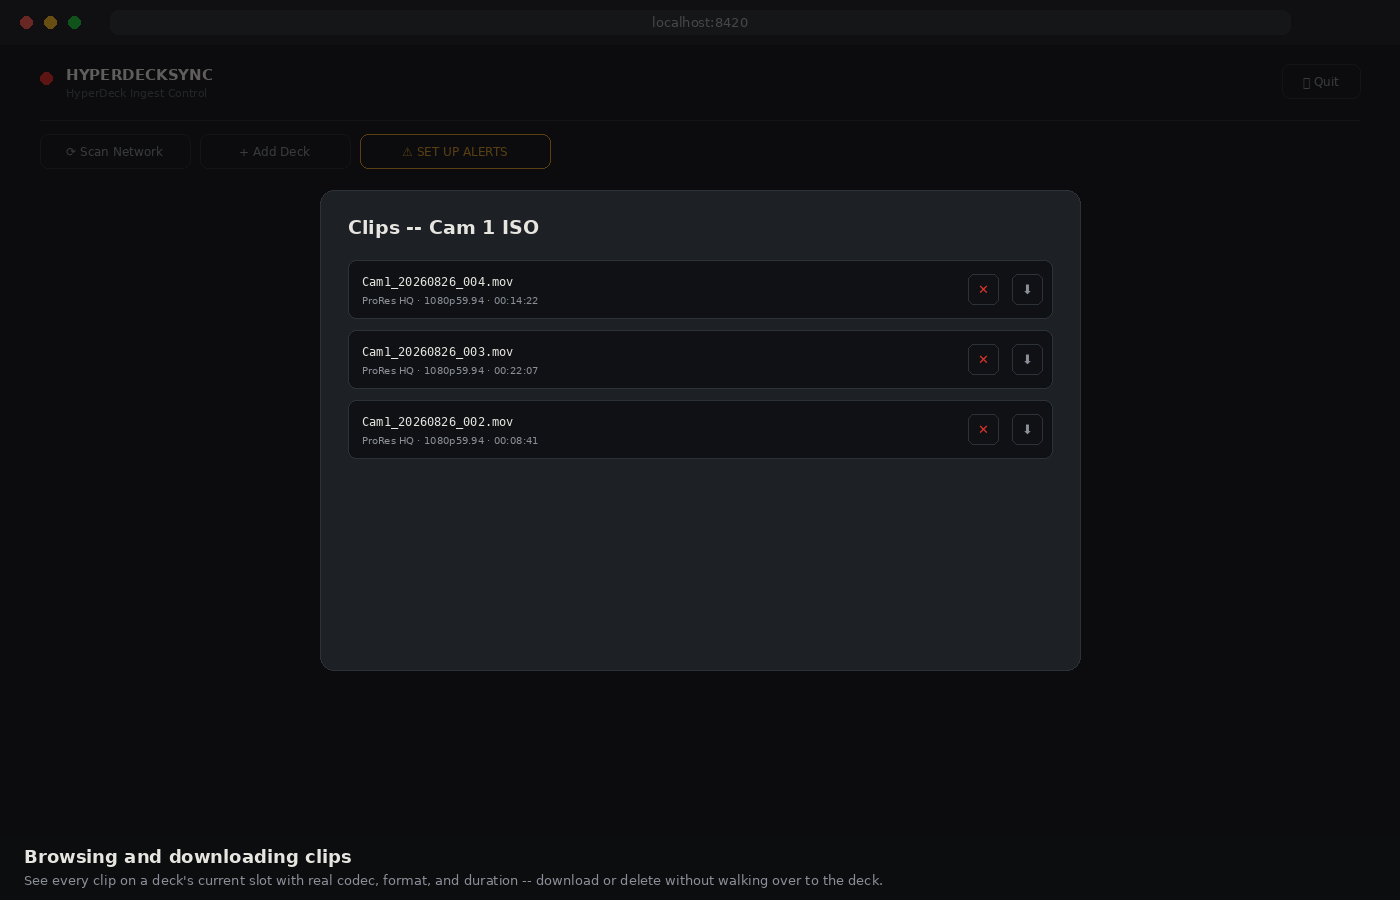
Click the grid icon on any deck to see every clip on its current storage slot — real codec, format, and duration, not guesswork.
Download a clip straight to your Mac, or delete one to free up space, without walking over and touching the deck at all.
The activity log
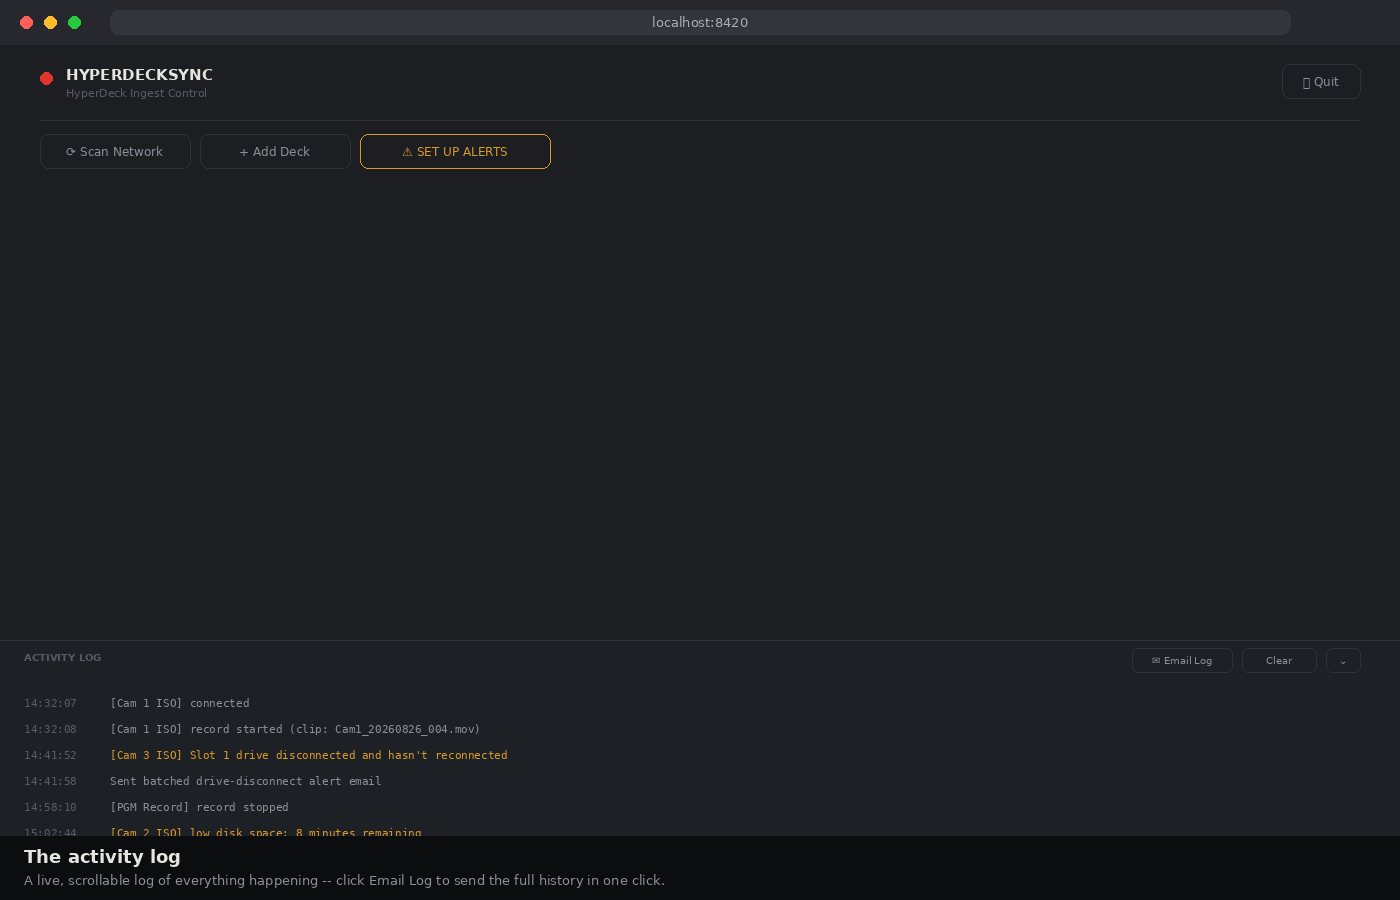
A scrollable strip at the bottom of the screen shows everything that’s been happening — connections, recordings starting and stopping, warnings. Click the arrow to expand it for a longer view.
**✉ Email Log** sends the complete history in one click using the same email settings as your alerts — handy if you ever need to share what happened during a shoot, or just want a record of it.
Quitting
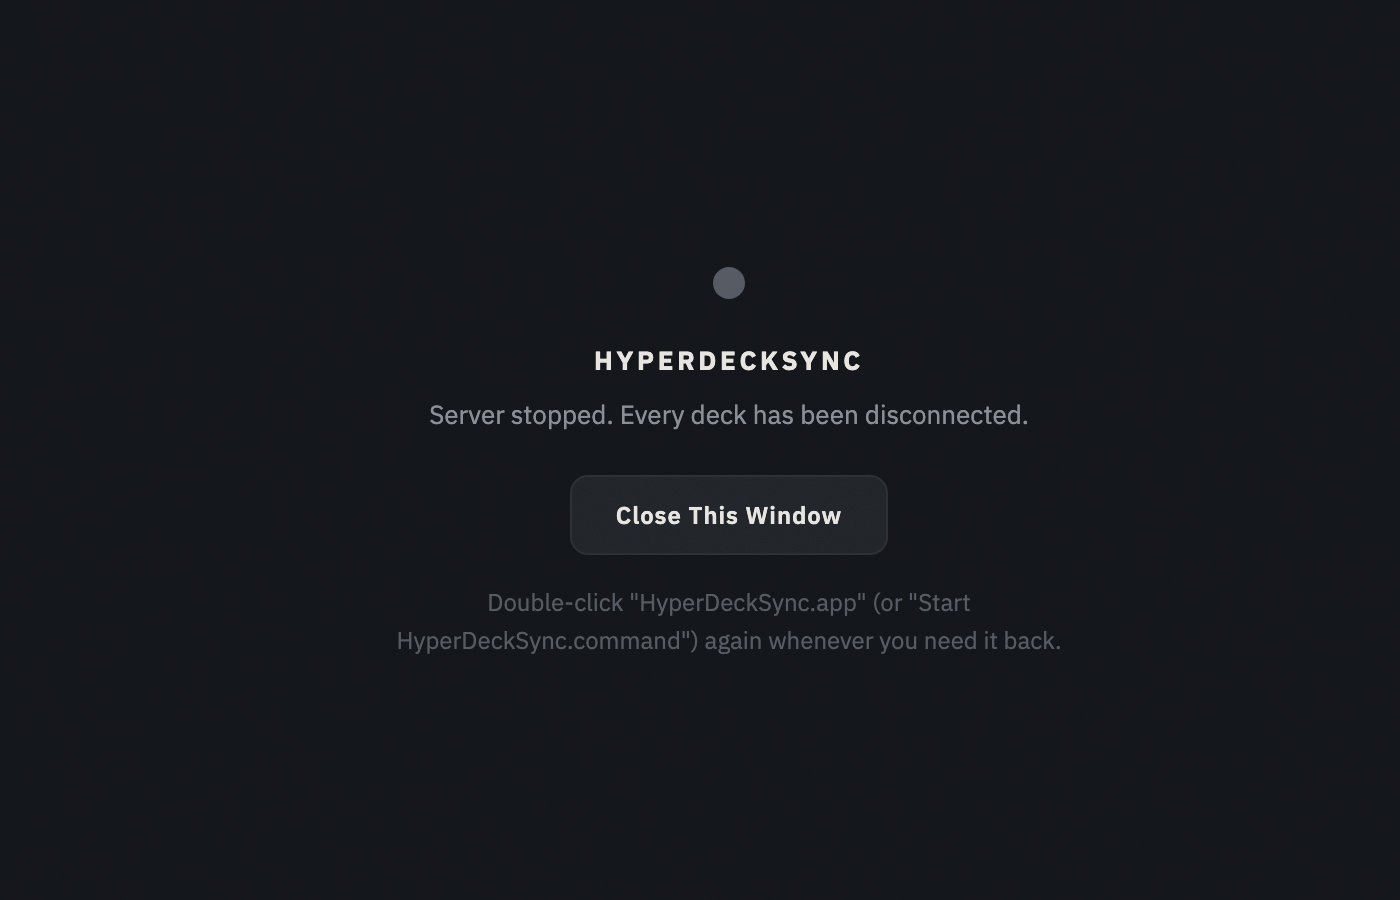
Use the **⏻ Quit** button in the top-right corner. It disconnects every deck properly and stops the server cleanly.
If anything’s currently recording, it’ll warn you first — quitting stops HyperDeckSync from seeing that deck, but doesn’t stop the recording itself, since that keeps running on the deck regardless of whether
anything’s connected to it.